
3D printing is touted as the new revolution in manufacturing and will soon surpass all methods of product development. Unfortunately, this is not true.
It is revolutionary, in the fact that it allows manufacturing to be placed in the hands of the common people, however, it will not surpass the manufacturing techniques in place.
Here are some of its advantages:
However, it does not come without its disadvantages such as:
- Almost anything or any object can be printed so long as you can draw
or model it(Hence, why we learnt Fusion 360)
- Also, items that are not normally created using using subtractive manufacturing,
can be 3D printed
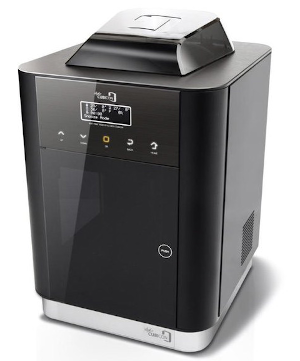
| Printer | Ultimaker 2+ | Cubicon Style 3DP-2105 | MBot 3D Grid 4 |
|---|---|---|---|
| Examples | 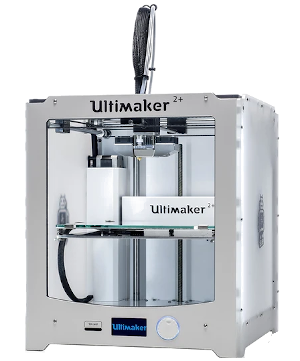 |
 |
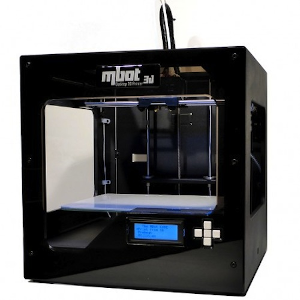 |
| Object Size | 210x210x205 mm | 150x150x150 mm | 235x210x190 mm |
| Filament Diameter | 2.85mm | 1.75mm | 1.75mm |
| Type | Open filament | Open filament | Open filament |
The 3D printing process can be broken down as follows:
- Creating a usable 3D design- Converting the design into a 3D representable file (.STL)
- Slicing the 3D representable file into layers
- Converting the layers into instructions for the 3D printer (gcode)
- The 3D printer creates the 3D object.
The 3D Printing Process is a Digital Fabrication process. We start with a digital
design and convert it to a format which the 3D printer can implement.
The digital process begins with a design of a 3D model, which can be obtained by:
- Designing with CAD software (e.g. Fusion 360)
- Curated from archives (e.g. Thingiverse, My Minifactory or other libraries)
In using CAD, we develop a 3D model in the application of choice, we need to find a common
technique of representing this model. The two common methods are:
STL (Standard Tesselaltion Language)
OBJ
| Ways to save as .STL | Example |
|---|---|
| 1. Direct saving as STL a) Object Browser -> Select Object -> R-click -> Save as STL b) Select Folder and Name |
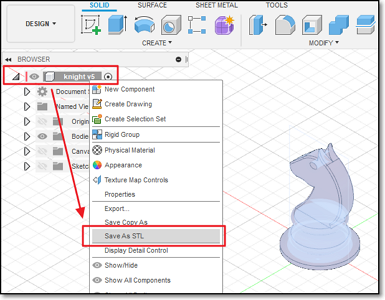 |
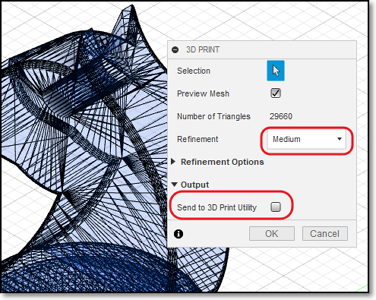
| 2. Tools -> Make -> 3D Print | 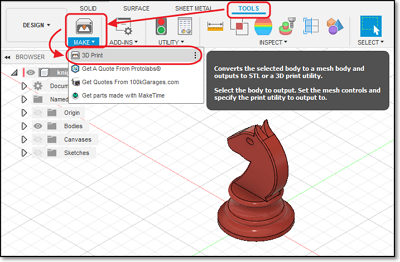 |
| 3. 3D Print Menu a) Select Object b) Preview Mesh : Yes c) Refinement : Medium d) Output > Send to 3d Print Utility : No Output will be saved as an STL file. |
 |
Now, we are ready to slice our STL file:
- Slicing cuts the object into layers.
- Each layer is a printable level in the X-Y coordinates.
- The 3D Printer head moves up one layer at-a-time in the Z-axis.
I will be mainly focusing on the ultimaker cura software which can be applied
to the 3 above printers.
Feel free to download it if you have not
The main job of the slicer software is to convert the STL file into layers, determine the print characteristic of each layer* convert the print characteristics of the layer into a language understanable by the 3D Printer (usually gcode)
The slicer software will usually have the configuration code for a particular set of 3D Printer(s). The machine-readable code is saved/transferred to the 3D Printer using a SDCard/Thumbdrive or by network to perform the actual printing process.
These are some of the common characteristics you can adjust:
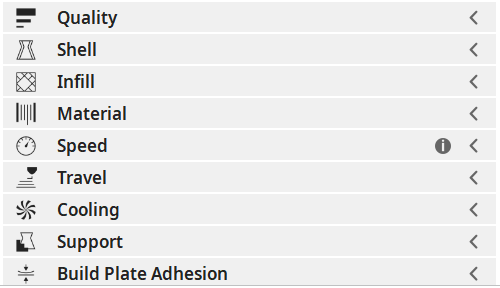
However, I will only be covering 4 of the more important characteristics:
|
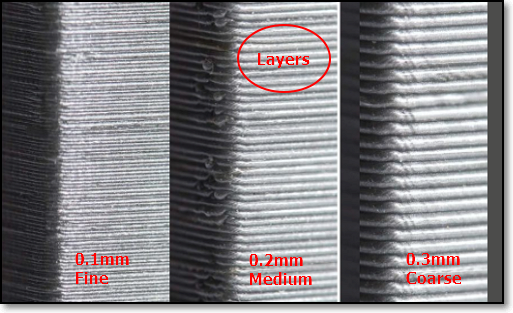
Quality/Layer Height - The height of each printed layer of the 3D print - Thinner layers give finer prints - 3D prints with thinner layers take longer to print - Ranges from 0.1~0.4mm for a 0.4 nozzle (typical 0.2mm) - Affects resolution, speed and smoothness of print |
|
|
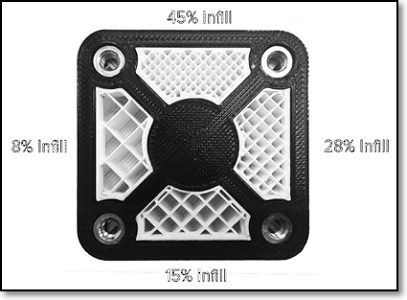
Infill - Controls the amount of fill in the internal cavities. - Higher infills give more strength. - Higher infills take longer time to print. - You can select different infill patterns. - Typical infills 10~18%. |
|
|
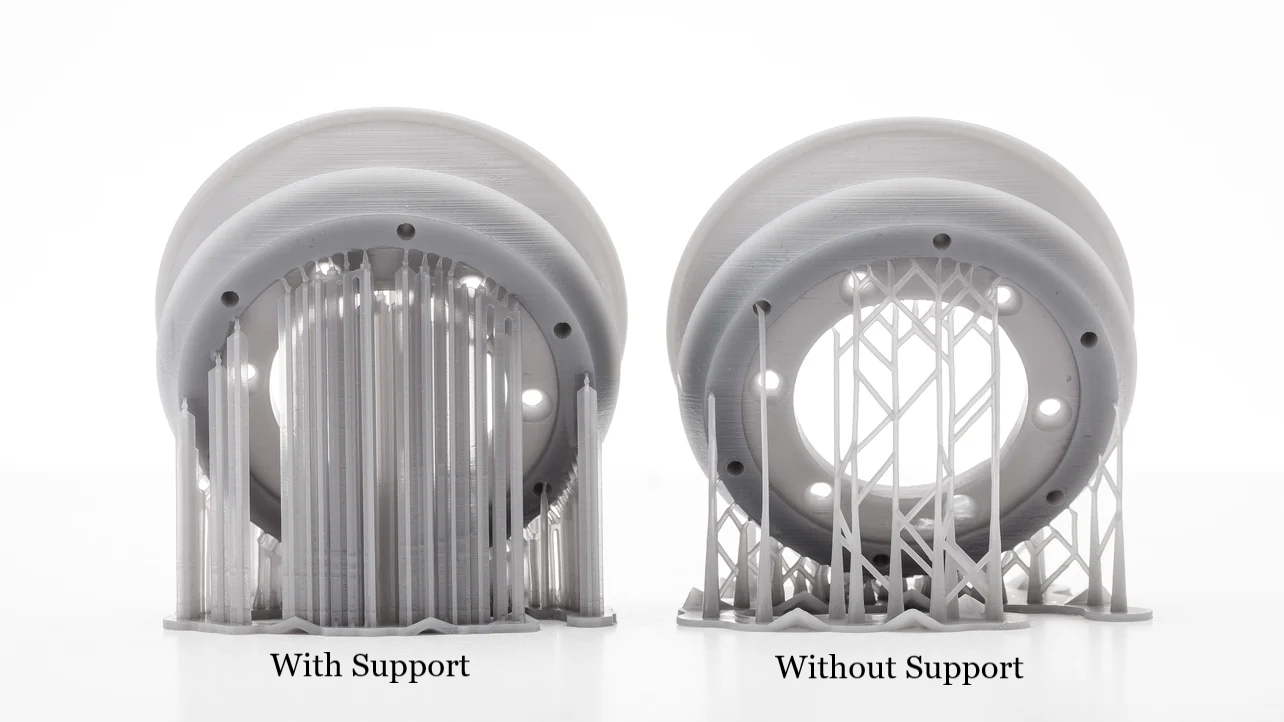
Support - Supports are used to aid in printing overhangs - Supports make impossible prints possible - Supports are removed after the print is complete - Supports add to the print time as well as the touch-up and finishing time to the model - Orientation of the model helps in the determining of supports |
|
|
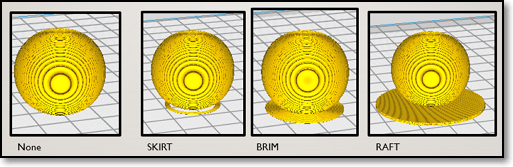
Build Plate Adhesion - The print bed is usually heated to improve adhesion - Skirts are used to provide an outline - no adhesion - Brims allow some adhesion to the print perimeter - Rafts are full platforms on which the 3D print is placed. Print adhesion is onto the raft instead of the bed. |
|
Feel free to experiment with the different settings:) .
Different settings can increase or decrease the time taken to print your object.